

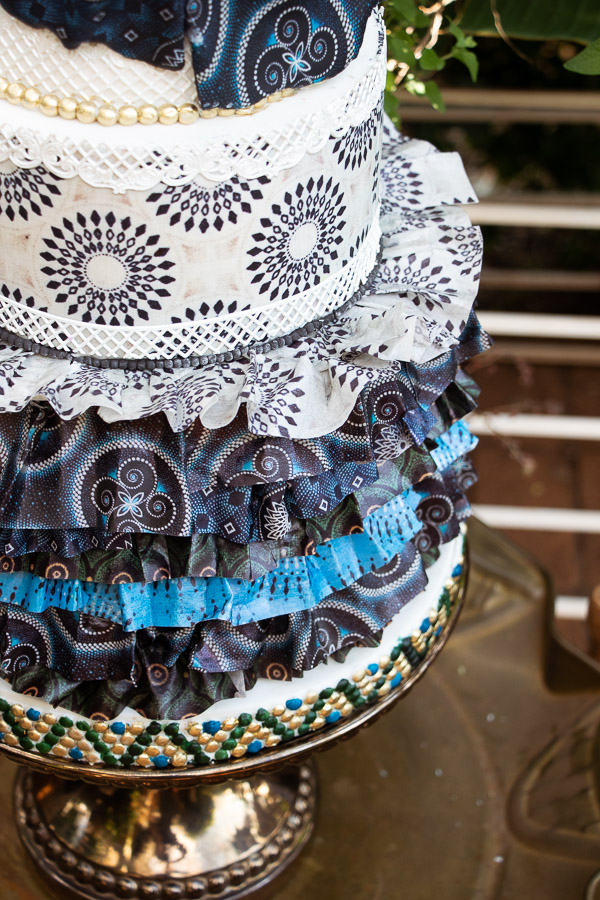
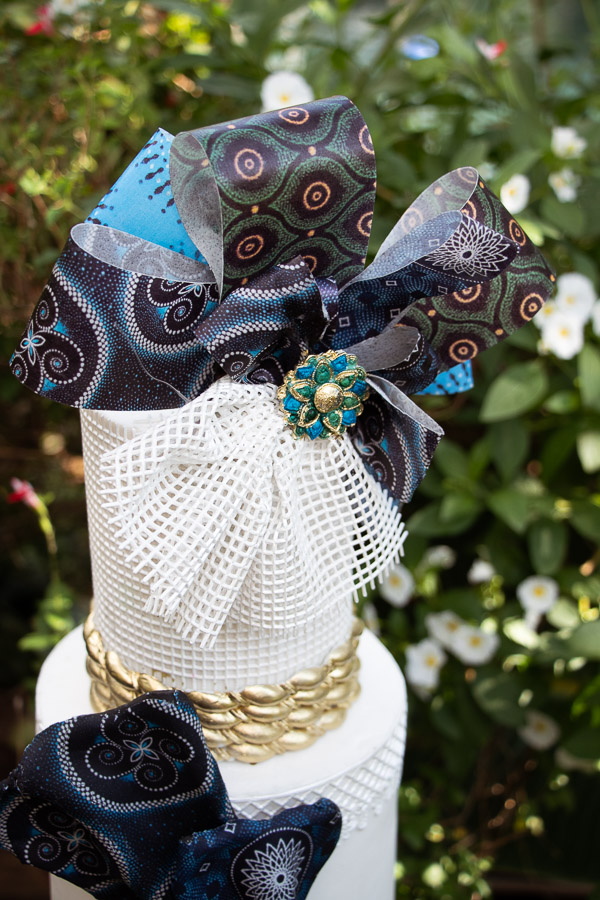

R55,00 – R90,00Price range: R55,00 through R90,00
R38,50 – R63,00Price range: R38,50 through R63,00
Send us your own graphics or artwork for a custom African and shweshwe and we will print it for you.
You have the following 3 options:
Printed Icing Sheet:
These sheets are approx A4 size & are perfect to cover your cakes with a beautiful smooth finish.
Printed Wafer Paper Sheet:
These sheets are approx 180x280mm in size. Thin and easy to use.
If you have any custom requests, send high-resolution artwork to creative@crystalcandy.co.za
All Pictures shown are for illustration purposes only. The colours of the actual product may appear different from the digital representation
We have two options available Icing sheet and Wafer paper see instructions below.
Icing Sheet Instructions:
Icing sheets can also be called frosted sheets, some call them edible transfer sheets.
DO NOT REFRIGERATE. This can dry out the edible transfer sheet and cause it to crack. Simply store the icing sheet flat in a zip lock bag at room temperature.
Important Preparation Steps:
The graphic is printed directly on a layer of icing, which is supported by a removable backing sheet. Prior to application, carefully remove the backing sheet from the frosting sheet. To maintain freshness, store the frosting sheet in a sealed zip lock bag until ready to use.
No refrigeration is required for the frosting sheet. Simply store it at room temperature, away from direct light. The shelf life of the frosting sheet is approximately 12 months.
Once the plastic backing is removed, your icing sheet is ready to be applied. Get ready to create stunning designs with ease!
You Can Use Icing Sheets On:
Buttercream: Most effective method is on the buttercream-type frosting.
Whipped Cream: Whipped cream has high water content; you should apply the edible image as close to serving time as possible. Any very high moisture content frosting will tend to cause bleeding. To avoid bleeding/fading add a thin coating of fondant to the edible image.
Ice-cream cake: let ice cream soften slightly before applying the edible image. Or you can mist the surface of the ice cream with milk before applying the edible image. For optimal results apply aa thin layer of fondant to the back of the icing sheet before applying it to the ice-cream cake.
Fondant: Using a brush, apply piping gel where your image will be placed.
Cookies: There are several ways to add an icing sheet to cookies. Regular icing, frosting, royal icing, or corn syrup thinned with a little water will adhere to the image to most cookies.
Hard Candy Lollipops: Lightly coat the lollipop with thinned-out corn syrup or piping gel and apply the image on top.
Frosting Colour and Placement:
For optimal results, use light-coloured icing when applying transfers. Dark colours may show through the design due to the thin layer of icing. If using dark colours as a base, consider placing a thin layer of fondant behind the frosting sheet to prevent colour interference.
Timing of Application:
If using buttercream or a firmer frosting, you can apply the image at your convenience, up to 48 hours before the event. However, if your frosting is moist, the image may fade due to excess moisture. To avoid this, apply the image within an hour of the event.
Application Process:
Water can damage the icing sheet, so avoid contact at all costs, as the sheet will melt and ruin the print.
Carefully remove the image from the backing sheet by gently rolling the backing sheet over a table edge or countertop, with the image facing upwards, loosening the image.
Place the edible transfer sheet on top of your cake, holding the ends and gently applying pressure from the middle, then the ends. Smooth out the image, ensuring the edges adhere to the cake. When applying image strips to the cake sides, follow the same process. Trim any excess overlapping or extending off the cake if necessary.
Helpful Hints on working with frosting sheets:
Removal of sheets that seem to stick to the backing sheet:
Pulling the backing of sheet over the sharp edge of a tabletop a couple of times. This technique will help to pop the image off the backing sheet. If this doesn’t work the humidity is too high. Exposure to high humidity may cause the first sheet to absorb moisture and stick to the backing, making it hard to peal.
If you experience this, do not try to remove the backing as it will destroy and tear the edible print.
Try the following:
Lay the sheet on a pan and place it in a warm dry oven ±30 ℃ for about 8-10 minutes after which the images will usually easily peal from the backing. This is the best option.
Another way is to use a hair dryer on both sides of the sheet and dry it on high for 30-second intervals in a circular motion. Make sure not to overheat the print. Repeat until the icing sheet stiffens up and the backing should be removed easily.
Place the frosting sheet into a deep freeze for about 30 seconds, when we have high-humidity days you may need to leave it in for longer. The backing should be removed immediately after taking it out of the freezer. Use this as a last resort.
What You Get
A single colour graphic printed on an icing sheet ~ Approximately A4 Size
What is Wafer Paper?
Wafer Paper is a versatile addition to your cake decorating collection. It offers a subtle flavour that won’t overpower your cake.
It’s fully edible and made from potato starch, making it vegan and gluten-free.
The paper is lightweight, thin, and easy to apply, moisture can have a negative reaction to the wafer paper.
Store unused wafer paper in a Zip lock bag in a cool, dry place.
You can cut, tear, and shred it to create beautiful prints, flowers, butterflies, lace, and more.
Water can damage the wafer paper print, so avoid contact with large amounts of water to prevent print from melting and being ruined.
Use our elite range of mesh stencils and piping gels to add stunning designs.
To attach wafer paper prints or overlays, ensure the cake surface is cool and not tacky, and gently apply with piping gel or wafer paper conditioner.
Get Creative
Get creative and have fun with wafer paper – it’s the secret ingredient for amazing cake decorations!
Create your own wafer paper glue with ease! Just grab a glass and fill it with shredded wafer paper offcuts.
Slowly add water until the offcuts are covered, then let it sit overnight to bloom. Give it a good stir, and you’ll have a smooth and thick consistency.
Adjust it by adding more water or wafer paper as needed.
This glue is perfect for attaching wires, petals, ruffles, and paper butterflies to your cake.
What You Get
Size: Approx. 180 x 280mm
| Pick an option | Printed Icing Sheet, Printed Wafer Paper |
|---|


Do you want to hide this popup?
Welcome to our brand-new online home! Don’t worry, you will still find all of your favourite Crystal Candy products right here, just with a much faster and cleaner shopping experience.
Thank you so much for your patience and continued support. Explore, look around, and happy shopping!
Reviews
There are no reviews yet.